
The Flash and Focus
 Light coming from left |
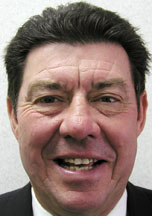 Light coming from above |
You can tell that no flash was used by looking at the eyes (no highlight from the flash) and the direction of the shadow. In the photo of the woman there is a shadow on the right side and in the photo of the man the shadows are under his eyes and nose.
The photos are fuzzy because it is difficult to hand hold the camera inside without the flash. The reason for this is indoor light is low and the camera in the auto mode will choose a low shutter speed. It is nearly impossible to create realistic simulations with photos of this quality. The problem is the shadows. If you enlarge a photo and look in the shadow areas you will see many pixels of different color. Here lies the problem. When trying to retouch these shadow areas they end up looking flat and un lifelike.
Another issue with no flash being used can be different light colors in the photo. You may have an office that has a mix of daylight, tungsten lights and florescent lights. These three light sources have different color properties and will create different color casts in the photo which is impossible to correct.
Be careful if you a placing your patient against a white wall because the wall will reflect a lot of light when the flash goes off and the camera will think that the subject is very bright and the results often are a dark photo. Many of our clients use blue poster board which can be purchased at most office supply stores. The blue tone creates a very nice separation between the patient's head and the background and the blue does not reflect as much light and therefore your exposures are better.
Not Enough Light
 |
 |
These photos are fuzzy even though a flash was used. With auto focus cameras (both point and shoot and digital SLRs), the cameras need enough light to focus properly. Put your patient in a well lit area and focus on an area of the face that has some contrast, like the eyes. Hold down the shutter release part way to focus and without moving your finger, move the camera after focusing to frame your subject with the top of the head and neck in the frame.
If you are using a digital SLR, I recommend turning off the auto focus mode for full face smile portraits. From my experience in look at many photos our clients send us, out of focus photos is the biggest issue. The problem more often than not is the camera being in the auto focus mode. There just does not seem to be enough contrast for the camera to focus on. This is why it is always best to manually focus for portraits.
Another thing you may want to take a look at is the dioptor. This is a little dial right by the view finder on both point an shoot cameras and digital SLRs. The dioptor can be adjusted to how your eye focuses. Look through the view finder at a brightly lighted subject and turn the dial of the dioptor until the subject comes into sharp focus. You may want to check this dial from time to time to make sure it is still adjusted to your vision.
Also, for point and shoot cameras be careful to put the camera back in the normal mode if you had it set to the macro mode for close-up or intraoral photos. In the macro mode the camera is set to focus on close objects (often 12" or closer). Objects further away will be out of focus.